



What causes a truck radiator to fail before its expected service life?
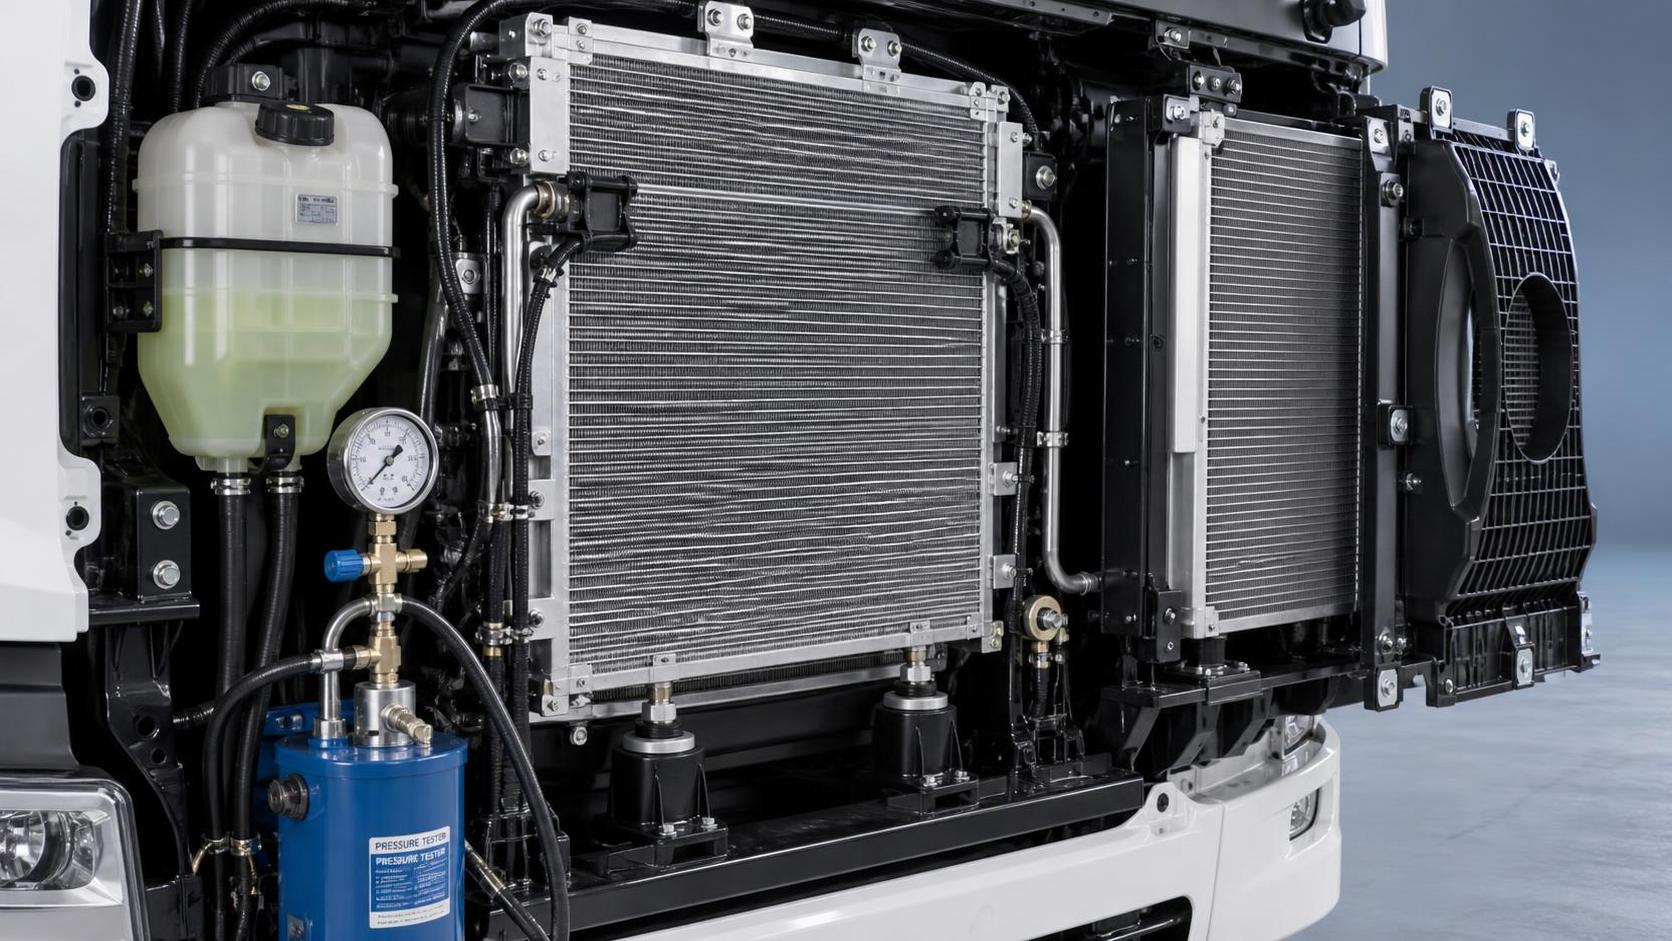
What Causes a Truck Radiator to Fail Before Its Expected Service Life?
A truck radiator rarely fails early for one simple reason. In most workshop inspections, the visible problem—a coolant leak, repeated overheating, a cracked plastic tank, or a blocked core—is the final stage of a longer process. Contaminated coolant, corrosion, external blockage, vibration, pressure imbalance, and installation errors can each reduce heat-transfer capacity or weaken the radiator structure. When several of these conditions occur together, a truck radiator may fail well before the service life expected from a correctly matched and maintained unit.
The practical challenge is that radiator symptoms often overlap with faults elsewhere in the cooling system. A high engine temperature does not automatically mean the core is defective; the cause may be a stuck thermostat, weak fan clutch, restricted charge-air cooler, faulty pressure cap, water-pump issue, or combustion gas entering the coolant. Replacing the radiator without tracing the root cause can simply transfer the same conditions to the replacement part.
For heavy-duty and commercial vehicle maintenance, early diagnosis matters because overheating can quickly lead to warped cylinder heads, damaged gaskets, reduced lubricant performance, and avoidable downtime. A reliable repair starts with understanding why the original radiator deteriorated, not merely where it began to leak.
Coolant Contamination and Poor Water Quality
Internal contamination is one of the most persistent causes of premature radiator failure. Coolant is not just colored water. The mixture must transfer heat, resist freezing where relevant, limit corrosion, suppress cavitation risk, and protect the different metals and elastomers throughout the cooling circuit. When the coolant chemistry is unsuitable, diluted incorrectly, or allowed to remain in service after its protective additives are exhausted, internal deterioration can begin long before an external leak is visible.
Using untreated or mineral-heavy water can leave scale deposits in narrow radiator tubes. Even a thin layer of mineral scale acts as insulation between the coolant and tube wall. The engine may then run hotter under load despite an apparently full radiator. Restricted tubes also create uneven flow paths: some sections work harder while others receive insufficient circulation. This can create local hot spots and accelerate fatigue around tube-to-header joints.
Oil contamination requires a different response. If engine oil or transmission fluid enters the coolant through a failed oil cooler or related internal heat exchanger, it can coat internal surfaces and attack hoses, seals, and plastic components. Flushing may be necessary, but a flush alone is not a repair unless the source of contamination has been removed. Likewise, combustion gases entering the cooling system can produce overpressure, coolant loss, and repeated radiator damage. A replacement core cannot compensate for a head-gasket or cylinder-head problem.
What to look for during inspection
Inspect coolant appearance, but do not rely on color alone. Sediment in the expansion tank, gel-like residue, oily film, rusty deposits, or an unusually sharp odor all justify further investigation. Check whether different coolant types have been mixed, whether the vehicle has a documented coolant-service history, and whether the specified concentration is being used. If the removed radiator is cut open during failure analysis, deposits concentrated near inlet passages or tube entrances can point to poor coolant condition or inadequate filtration.
Corrosion Is Often a System Problem
Corrosion is frequently blamed on radiator material alone, but the real cause is usually the operating environment inside the cooling system. Modern cooling assemblies may contain aluminum, steel, brass, soldered joints, plastic tanks, rubber hoses, and various sensor or fitting materials. Incorrect coolant chemistry, depleted inhibitors, stray electrical current, or chronic aeration can create conditions that attack vulnerable surfaces.
Electrolytic corrosion deserves particular attention when a radiator develops pinholes without obvious impact damage. Poor grounding, damaged wiring, aftermarket electrical modifications, or a charging-system fault can contribute to stray current in the coolant. The radiator may become the part that fails first because its thin aluminum tubes are especially sensitive. Before fitting a new unit, verify battery and engine grounds, inspect cables and connectors, and investigate abnormal voltage conditions with appropriate test procedures.
Air trapped in the cooling system can worsen corrosion and cavitation. Low coolant level, a leaking cap, an incorrectly routed bleed line, or incomplete filling after service may allow repeated aeration. This is why a radiator replacement should include attention to the expansion tank, cap, small return hoses, and bleeding method. A sound core installed into an air-bound system is still at risk.
External Blockage Reduces Heat Rejection
The radiator needs airflow as much as it needs coolant flow. Heavy trucks operating on construction sites, farm roads, mining routes, waste-collection routes, or dusty logistics yards may accumulate debris across the front cooling stack. Insects, mud, leaves, road film, cottonwood-type fluff, and oily dust can block the fins of the condenser, intercooler, oil cooler, and radiator. The radiator may be clean on its visible front face while the restriction sits between stacked heat exchangers.
This condition often appears as overheating during slow-speed work, high ambient temperature, hill climbing, or prolonged PTO operation. At highway speed, ram air may temporarily conceal the problem. Technicians should inspect the complete cooling pack rather than washing only the accessible surface. Cleaning must also be done carefully. High-pressure water or aggressive air blasting at the wrong angle can fold delicate fins, reducing airflow permanently. Where manufacturer instructions are available, they should govern cleaning direction and pressure.
Bent fins are not merely cosmetic. If a broad section is flattened, airflow resistance rises and the effective heat-transfer area falls. The same applies to aftermarket grille screens or auxiliary accessories that restrict the path through the cooling stack. Any modification around the front end should be assessed for its effect on air volume, sealing, and fan performance.
Vibration, Chassis Movement, and Mounting Stress
Truck radiators live in a difficult mechanical environment. Engine vibration, road shock, cab movement, frame flex, and fan-induced airflow loads are all normal. The radiator is designed to tolerate these forces only when mounts, cushions, shrouds, and hoses are correctly positioned. Missing rubber isolators, hardened mounting bushes, incorrect fasteners, or an over-tightened bracket can transfer stress directly into the header, tank, or core.
Cracks near mounting points are a strong warning that the assembly has been constrained or repeatedly loaded. A split tank seam may be related to pressure, but it can also reflect distortion from a poorly aligned support frame. Check whether the radiator sits squarely in its lower saddles, whether upper brackets are forcing the tank sideways, and whether the shroud or fan has evidence of contact. On vehicles with previous collision repairs, confirm that the front support structure has not shifted.
Hose routing matters more than it appears. A hose under tension can pull continuously on a radiator neck. A hose that rubs against a sharp edge may eventually leak, lowering coolant level and causing secondary overheating. Reused clamps can also lose tension or cut into hose material. These small installation details often determine whether a repair remains stable through thousands of operating cycles.
Pressure Problems Can Damage a Healthy Core
Cooling systems operate under controlled pressure to raise the coolant boiling point. That pressure must be released at the correct threshold through the proper cap and recovery arrangement. A cap with the wrong rating, a blocked vent path, or a defective expansion tank can allow excessive pressure to build. The result may be swollen hoses, coolant pushed from joints, split plastic tanks, or leaks around crimped seams.
Conversely, a cap that cannot hold pressure may allow coolant to boil or escape too early under load. This can create air pockets and apparent radiator underperformance. Pressure testing the system and cap is therefore a useful diagnostic step, but it should be performed according to the vehicle specification. Applying an arbitrary test pressure risks creating damage rather than identifying it.
It is also worth distinguishing a pressure-related radiator failure from combustion-gas intrusion. If the system becomes hard soon after a cold start, repeatedly expels coolant, or shows unexplained pressure after correct bleeding, broader engine diagnosis may be needed. Installing a new truck radiator without investigating these signs is an expensive shortcut.
Wrong Fitment Is Not Always Obvious at Installation
A radiator can look correct in the workshop and still be unsuitable for the vehicle. Similar applications may use different core thicknesses, hose positions, transmission-cooler arrangements, mounting geometry, sensor ports, or cooling capacities. The visible dimensions are only part of the fitment decision. OEM reference, vehicle configuration, engine variant, and auxiliary cooling requirements should all be checked before installation.
For example, the XD4004 RADIATOR FOR ISUZU is identified with OEM reference 897387468 and dimensions of 512 × 468 × 36 mm. Those details are useful verification points, but they should be matched against the vehicle’s actual application and the removed unit rather than treated as a universal substitute for every ISUZU truck. Connection layout, mounting tabs, and any associated cooler configuration remain part of the inspection.
A core that is thinner than the required specification or lacks the correct internal arrangement may have limited reserve capacity under high load. A mismatched fan shroud can create air recirculation around the core instead of drawing air through it. Fitment verification should happen before coolant is filled, not after the vehicle returns with an overheating complaint.
A Better Failure-Analysis Routine
When a radiator has failed early, a disciplined sequence can prevent repeat repairs. Start by recording the visible failure location: tube pinhole, tank crack, crimp leak, damaged fin area, blocked passages, or impact damage. Then inspect the surrounding system before draining it completely. Coolant level, reservoir condition, cap behavior, hose hardness, fan operation, belt condition, and evidence of leakage all provide useful clues.
- Confirm coolant type, concentration, cleanliness, and any sign of oil or combustion-gas contamination.
- Inspect the full cooling stack for debris, bent fins, air gaps, and incorrect shroud placement.
- Check radiator mounts, isolators, brackets, hose routing, and fan clearance for mechanical stress.
- Test the cap and cooling-system pressure only against the applicable vehicle requirements.
- Verify part number, dimensions, ports, transmission cooler provisions, and mounting layout before replacement.
This approach takes more time than a straightforward part swap, but it turns the failed component into diagnostic evidence. It also helps distinguish a genuine radiator defect from damage caused by conditions the radiator was never intended to absorb.
Component Quality Still Matters—Along With the System Around It
A correctly engineered replacement radiator should have consistent core construction, secure joints, appropriate material selection, and application-specific fitment. Yet even a well-made unit cannot overcome contaminated coolant, a distorted mounting frame, or insufficient airflow. The most dependable outcome comes from treating the radiator as part of a complete thermal-management system.
Liaocheng Xinde Auto Parts Co., Ltd., established in 2018, focuses on the research, production, and global sales of water tank radiators, intercoolers, construction machinery radiators, heavy-truck components, and new-energy radiator modules. Its development has been accompanied by provincial and municipal recognitions including High-tech Enterprise, Civilized and Honest Enterprise, and Trustworthy Unit for Consumers. For maintenance work, the practical value of a specialized manufacturer is not a broad claim of durability; it is the ability to confirm application details and discuss the conditions that may have caused the previous unit to fail.
Before closing a radiator job, refill with the correct coolant, bleed the system fully, bring the engine to operating temperature, and recheck for leaks, fan engagement, stable temperature behavior, and recovery-tank operation. If the old truck radiator failed unexpectedly, retain it until the cause has been assessed. Its damage pattern may be the clearest indication of what must be corrected before the replacement is asked to do the same work.